4 Canva Features You Should Be Using Right Now
If you use Canva regularly, you already know how fast things move on the platform. New features appear constantly, and honestly - some of them are so useful that it feels like a waste not to know about them.
In this post I am walking you through 4 Canva features that not enough people are using. Some of them will save you time, some will make your designs look better, and at least one of them will make you think "wait, this existed all along?!"
Let's get into it.
1. Image to Video - Turn Any Photo into a Moving Visual
Did you know you can turn a still photo into a short animated video directly in Canva? Here is how to do it:
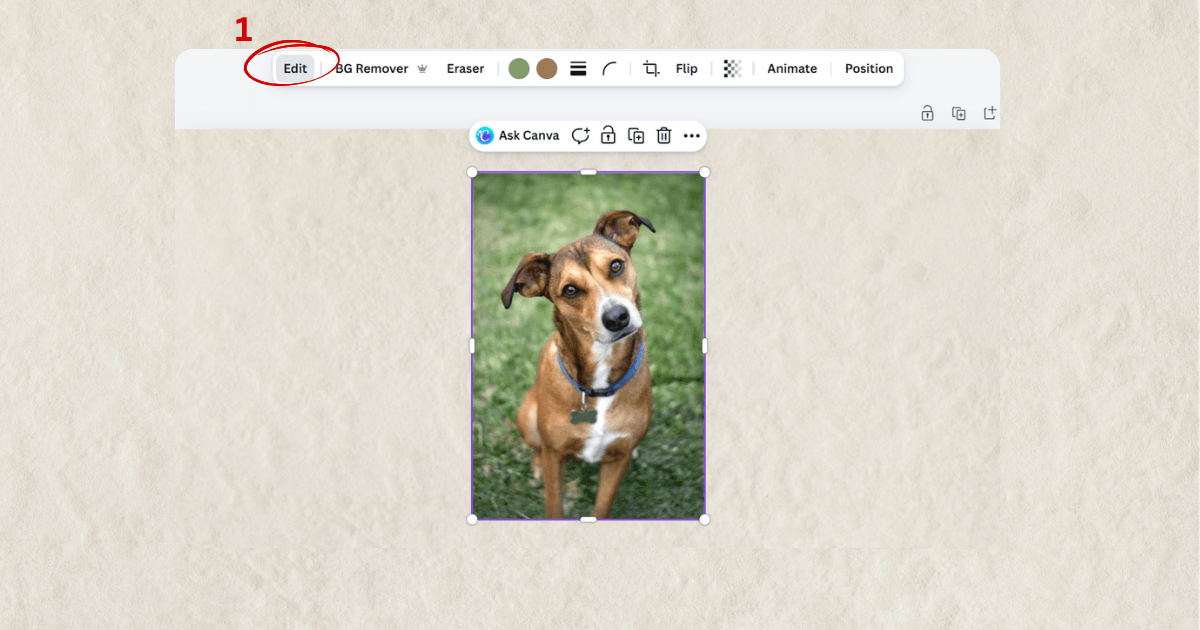
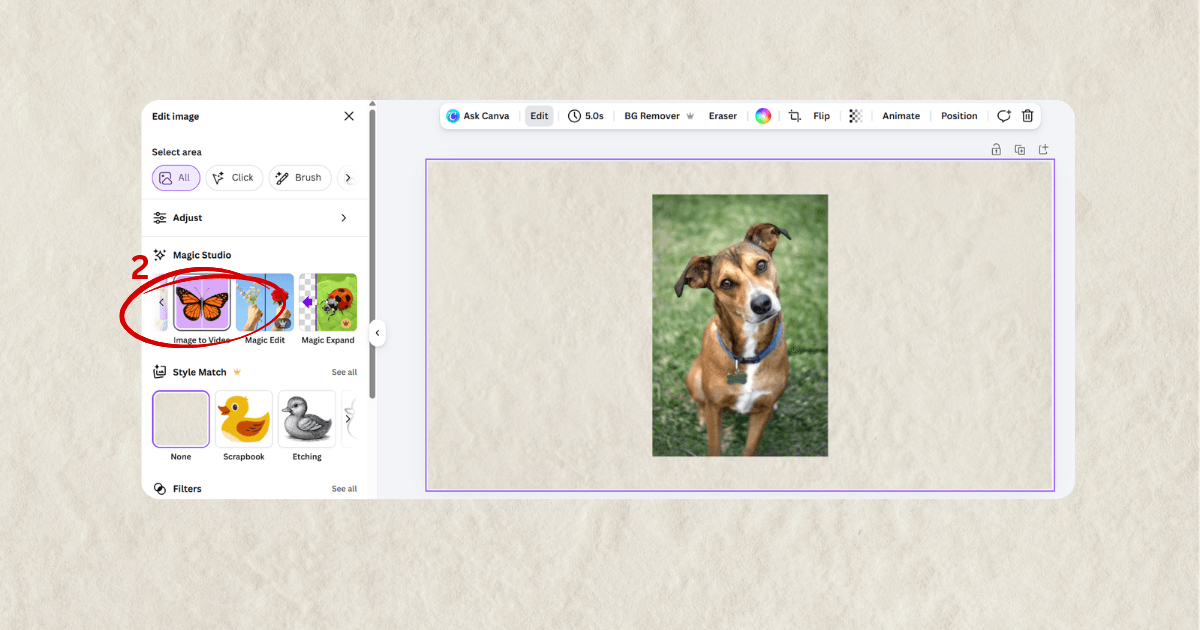
Upload your image to Canva, click on it to select it, then click Edit in the top menu. In the Edit panel on the left, scroll down to Magic Studio and select Image to Video. Canva will generate a short animated version of your photo.
A few things to know before you start:
There are two limitations worth mentioning. First, you cannot animate photos with real people in them. Second, you cannot animate paid graphic elements - only free ones, and even then the results can vary.
But here is a little workaround for the first limitation: instead of using a real photo of yourself, create an avatar first. You can do this directly in ChatGPT by uploading your photo and using a simple prompt like: "Turn the woman in this photo into a chibi-style cartoon." Once you have your avatar, bring it back into Canva and animate it.
Honestly, the results are not always perfect - but it is still a fun and creative feature that very few people are actually using. Worth experimenting with!
2. Change the Style of Any Element - Two Ways
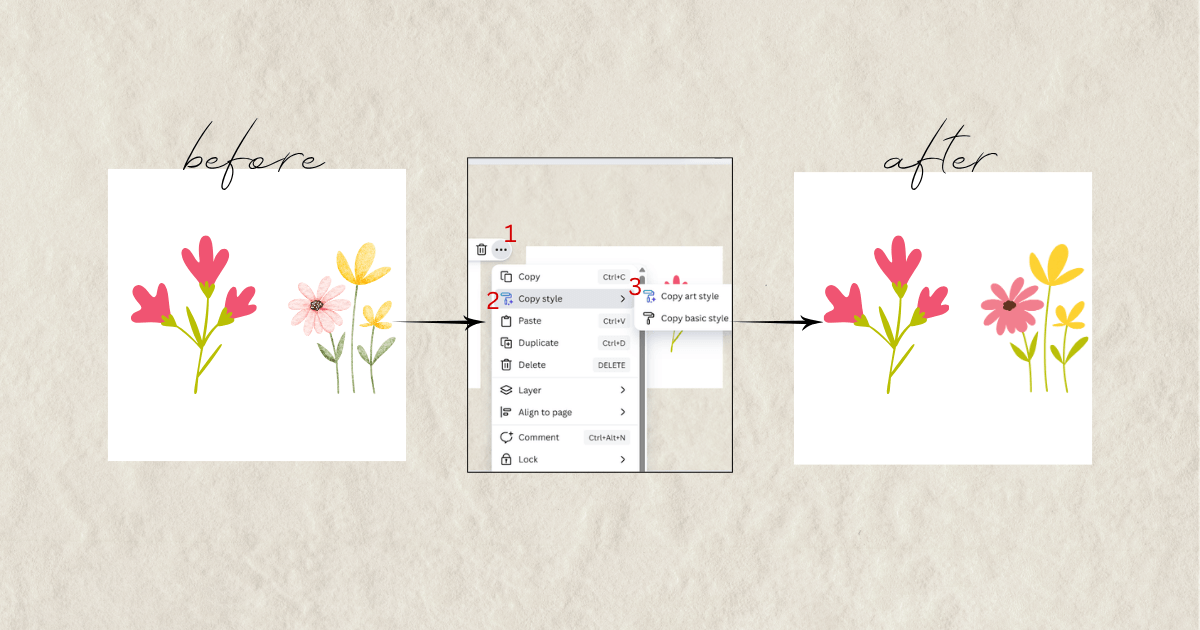
This one is a hidden gem. Canva has a feature that lets you copy the style of one element and apply it to another - so both end up with the same look. It is perfect when you want visual consistency across your design without manually adjusting every single element.
Here is the first way to do it: Select the element whose style you want to copy, then use the style copy brush to apply it to another element.
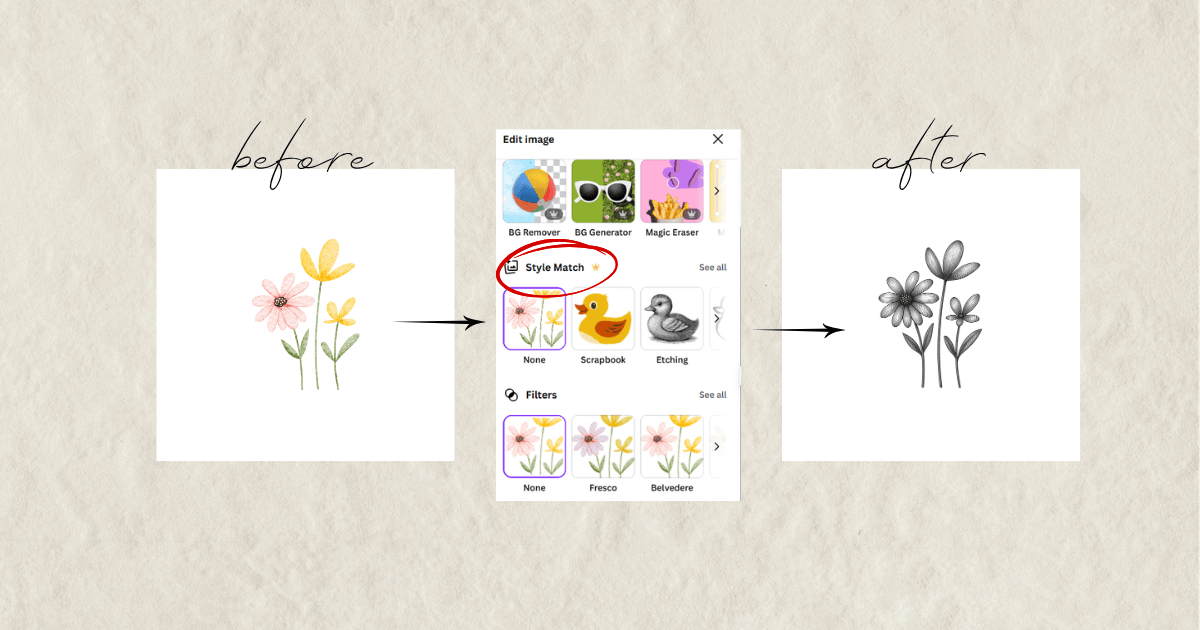
The second way gives you even more control. Select any element, go to Edit → Style Match, and choose from a list of preset styles to transform your element with just one click.
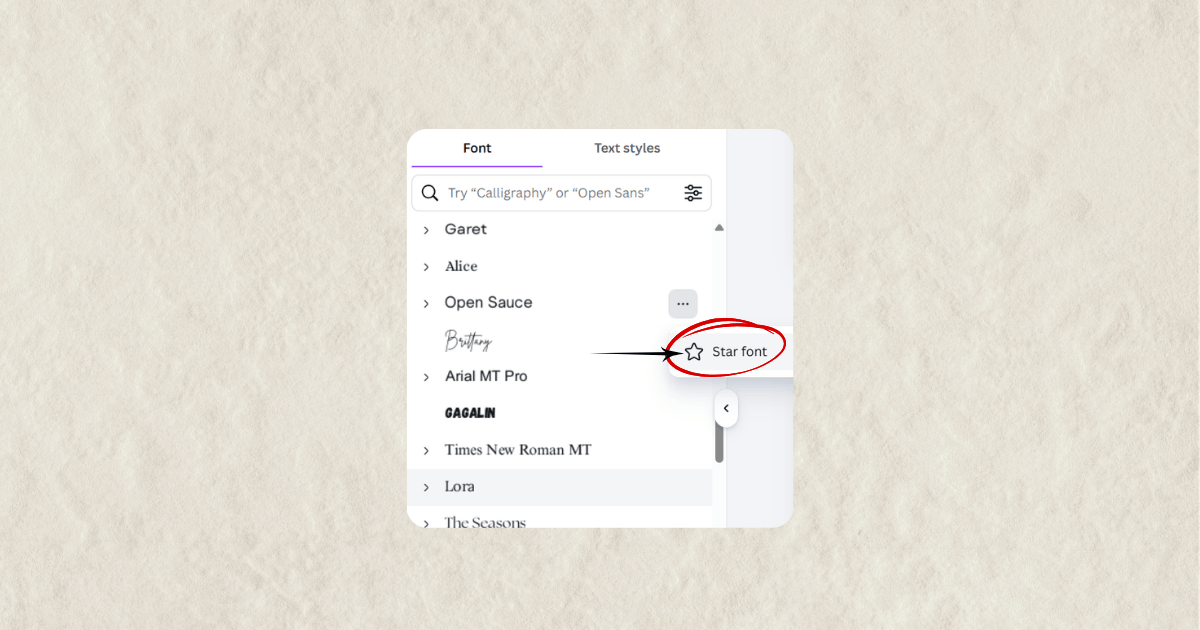
3. Did You Know You Can Save Your Favorite Fonts in Canva?
You spend ages browsing fonts, you finally find the perfect one, and then two days later you have completely forgotten what it was called. Sound familiar?
Well, Canva now lets you save your favorite fonts by marking them with a star. They will always appear at the top of your font list under Starred Fonts - ready to use whenever you need them. Simple, right?
4. Lock Only the Position of an Element
This one sounds a little strange at first, but once you understand it you will wonder how you managed without it.
Canva now lets you lock the position of an element so it cannot be accidentally moved - while still allowing you to edit it. One important note: for now, this only works with text.
So what does that mean in practice? You can lock the position of a text box so that nobody moves it around, but the text itself can still be edited, added to, or deleted.
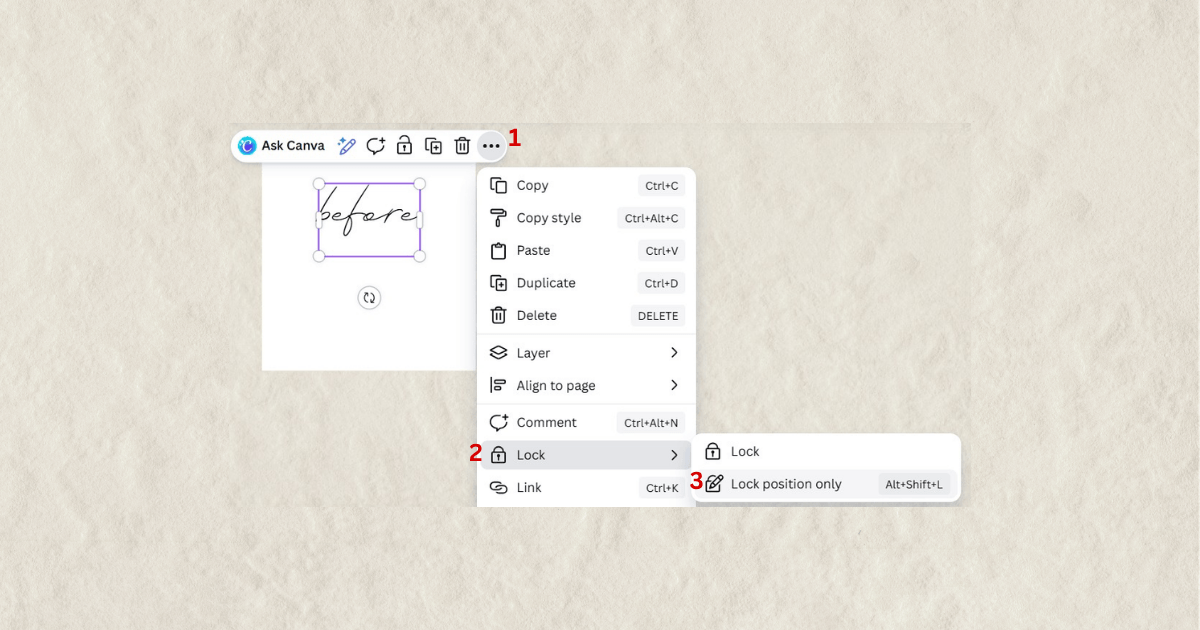
This is especially useful if you create templates to sell or share with clients. You want the design to stay intact, but you still need the text to be customizable. Now you can have both.
The more you know Canva, the faster you work - and the better your results look. These features are already there, waiting for you. The only question is which one you will try first.
If you found this useful, you might also want to check out my free guide - 25 Profitable Digital Product Ideas - perfect if you are thinking about creating and selling your own digital products.
And if you are ready to take your Canva skills to the next level, check out my Canva Crash Course - MRR + PLR Resell Rights - over 1.5 hours of easy video tutorials that will take you from beginner to confident in just one weekend.
We are in this together.
Hristina